
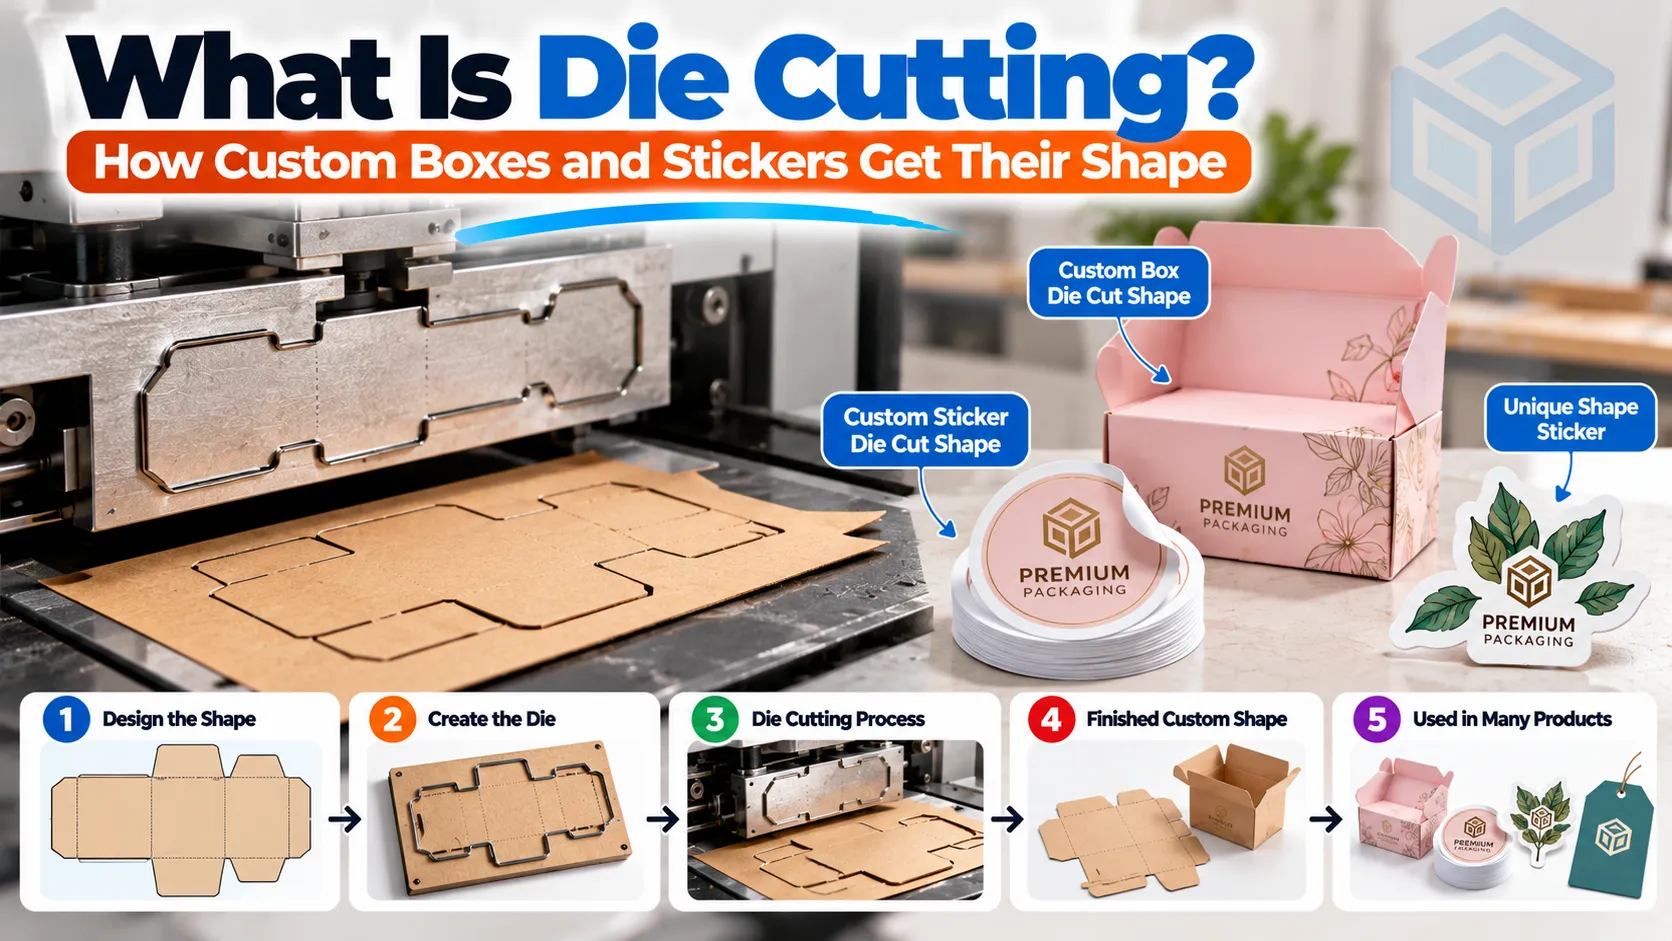
Die cutting is a way of cutting material into an exact shape using a custom blade called a die. The die is pressed into a sheet of paper, board, vinyl or film, and it cuts out the shape in one stroke, much like a cookie cutter. In packaging, die cutting is how flat printed sheets become boxes with flaps, tabs, windows and handles, and how stickers get their custom outlines.
Almost every printed box you’ve ever opened was die cut. Here’s how the process works and what it means for your packaging.
How die cutting works
- A dieline is drawn. This is the flat outline of the box or sticker, showing every cut line, fold line and glue area.
- A die is made from the dieline. For boxes, that’s usually a steel rule die: thin, sharp steel blades bent into shape and set into a wooden board, with blunt creasing rules for the folds.
- The printed sheet goes into a die cutting press. The press pushes the die into the sheet with enough force to cut through the material and crease the folds at the same time.
- The waste is removed (a step called stripping), leaving the flat box shapes, known as blanks.
- The blanks are folded and glued into finished boxes, or shipped flat for you to assemble.
Small rubber pads on the die push the material back out after each cut, and tiny gaps in the blade (called nicks) hold the pieces in the sheet until they’re stripped. If you’ve ever seen little rough spots along the edge of a box, those are the nick marks.
Types of die cutting
Flatbed die cutting
The die sits on a flat bed and presses down onto each sheet. It’s precise and handles thick materials like 24 pt board and corrugated, so it’s the standard method for folding cartons, mailer boxes and rigid box components.
Rotary die cutting
The die is wrapped around a cylinder, and material runs through continuously from a roll. It’s very fast, which makes it ideal for long runs of labels and stickers.
Digital (dieless) cutting
A computer-guided knife or laser follows the cut path directly from the file, with no physical die. It’s perfect for samples, prototypes and short runs, because there’s no die to make. The trade-off is speed: on big orders, a traditional die is much faster per piece.
| Method | Needs a physical die? | Speed | Best for |
|---|---|---|---|
| Flatbed | Yes, steel rule die | Medium | Boxes, thick board, corrugated |
| Rotary | Yes, cylindrical die | Very fast | Labels and stickers on rolls |
| Digital knife or laser | No | Slower per piece | Samples, short runs, complex one-offs |
Kiss cut vs through cut (die cut) stickers
These two terms come up constantly with stickers.
- A kiss cut slices through the sticker material but not the backing paper. The sticker peels off a larger backing sheet, which makes it easy to peel and lets you print several stickers on one sheet.
- A through cut (often just called die cut) cuts through both the sticker and the backing, so each sticker is an individual piece cut exactly to its shape.
Kiss cut sheets are great for product labeling and packs of small stickers. Individually die cut stickers look more finished as giveaways and merch. Our custom die cut stickers can be made either way. If you’re choosing a sticker size, our circle sticker sizes guide is a useful starting point.
What die cutting makes possible in packaging
- Box structure: flaps, tuck tabs, locking bottoms and dust flaps are all die cut.
- Windows: a cut-out window lets customers see the product, often backed with a clear PVC or PET film.
- Handles: carry handles on gift and food boxes.
- Custom shapes: pillow boxes, gable boxes, hexagon boxes and shaped soap boxes.
- Inserts: cardboard inserts with cut-outs that hold each product in place.
- Perforations: tear strips and easy-open features.
- Shaped bags: die cut mylar bags in custom outlines for snacks and edibles.
Die cutting costs: what to expect
For traditional die cutting, the die is a one-time cost. Once it’s made, it can be reused for every reorder of the same size and style, so the cost spreads out over time. Changing your artwork doesn’t need a new die, but changing the box size or structure does.
That’s why standard box styles in custom sizes are often cheaper than they sound: the die is built for your dimensions once, then reused. For very small orders, digital cutting can skip the die cost entirely.
Designing for die cutting
A few rules keep your design looking sharp after cutting:
- Use the dieline from your supplier. Don’t build the box outline yourself; every style has small allowances for board thickness.
- Add bleed. Extend background colors and images about 1/8 inch (3 mm) past the cut line.
- Keep a safe zone. Keep text and logos at least 1/8 inch inside cut and fold lines.
- Avoid very thin shapes. Narrow points and tiny cut-outs can tear, especially on thicker board.
- Mind the folds. Don’t put small text or barcodes across a crease.
- Choose the right stock. Thicker board needs wider gaps between cuts. Our guide to what cardstock is covers thickness options.
If you’re working out the size first, read box dimensions explained.
Custom die cut packaging from Apexio
We die cut boxes, inserts, windows and stickers to your exact size, from die cut soap boxes to fully custom shapes. Every order includes a free dieline and a digital proof, so you can see exactly where cuts and folds fall before production starts.
Frequently asked questions
It’s cutting material into a specific shape using a custom blade, called a die, that presses through the material like a cookie cutter.
A dieline is the flat template of a box or sticker. It shows cut lines, fold lines and glue areas, and it’s what the die and your artwork are built around.
A die cut (through cut) goes through the sticker and its backing. A kiss cut goes through the sticker only, leaving the backing intact.
No. A die can be reused for the same size and style. You only need a new die if the dimensions or structure change.
Yes. Corrugated mailer boxes and inserts are die cut on flatbed presses, which handle thick material well.