
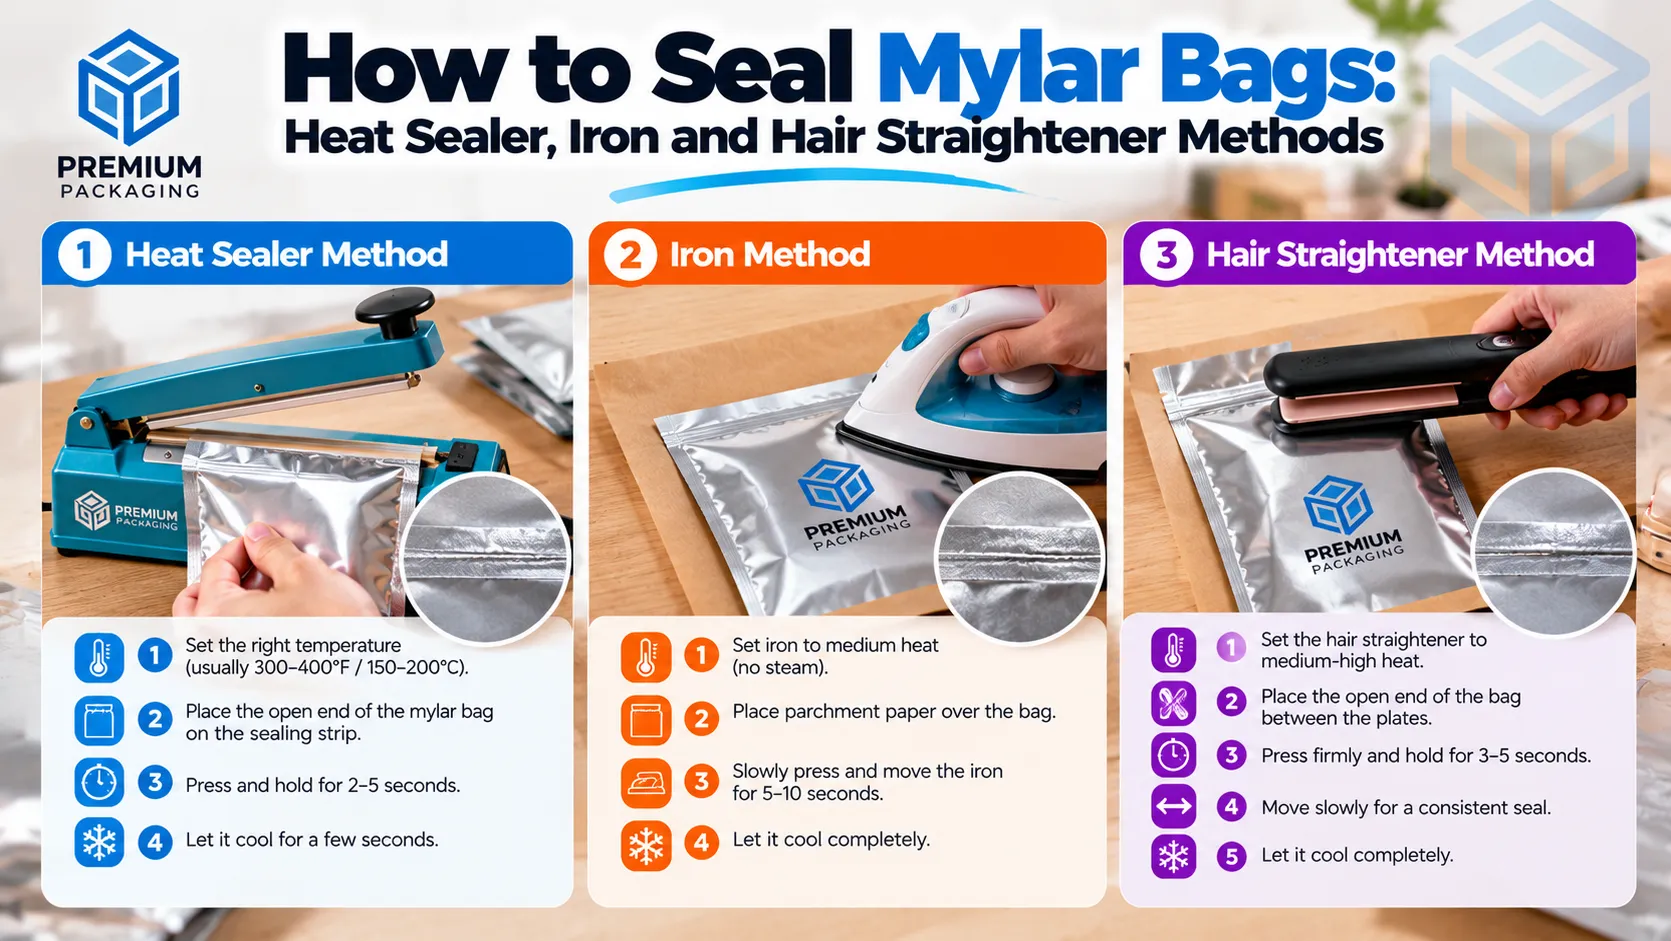
To seal a mylar bag, fill it, press out as much air as you can, then clamp the open end with heat for a few seconds until the inner plastic layer melts and fuses together. An impulse heat sealer gives the most reliable result, but a clothes iron or a hair straightener on a medium-high setting works well too. Make the seal at least 1/2 inch wide, check it for wrinkles, and add a second seal if the bag is for long-term storage.
Below we go through each method step by step, plus how to use oxygen absorbers and how to tell if a seal has worked.
How mylar bags seal
Mylar bags are made in layers. The outside is usually a polyester film (the actual “Mylar” material) laminated with aluminum foil or a metallized layer, and the inside is a food-safe polyethylene layer. Polyester doesn’t melt at sealing temperatures, but polyethylene does. When you apply heat and pressure, the two inner polyethylene layers melt into each other and form an airtight bond.
That’s why you need both heat and pressure, and why a bag that’s dirty or greasy at the opening won’t seal properly. The layers can’t fuse through crumbs or powder.
What you’ll need
- Mylar bags
- A heat source: impulse sealer, clothes iron or hair straightener
- A flat, heat-safe surface like a wooden board, plus a thin cotton cloth if you’re using an iron
- Oxygen absorbers if you’re storing dry food long term
- A marker for labeling
Method 1: impulse heat sealer (best)
An impulse sealer sends a short burst of heat through a wire when you press the arm down, then cools. It gives clean, consistent seals and it’s the method we recommend for businesses.
- Wipe the inside of the bag opening so it’s clean and dry.
- Lay the open end flat across the sealing bar, with no wrinkles.
- Press the arm down firmly and hold for the time recommended for your bag thickness. Thicker bags (5 to 7 mil) usually need a higher setting than thin ones.
- Keep pressure on for a second or two after the light goes off so the seal cools under pressure.
- Check the seal. It should be smooth, even and slightly cloudy all the way across.
For wide seals or thick bags, do two passes about 1/4 inch apart.
Method 2: clothes iron
A household iron works well, especially for bigger bags.
- Set the iron to a medium-high, dry setting (no steam). Start lower and test on an empty bag first, since every iron runs a little differently.
- Place a wooden board or a straight piece of wood under the opening. A level or a wooden ruler held edge-up works nicely.
- Fold the bag opening over the edge of the board so it’s flat and tight.
- Lay a thin cotton cloth over the top if your bags are thin, to avoid scorching.
- Press the iron down firmly and slide it slowly along the opening, 2 to 3 seconds per spot.
- Let it cool, then check the seal from end to end.
Method 3: hair straightener (flat iron)
A flat iron is perfect for small bags, like snack, tea or sample sizes.
- Heat the straightener to a medium setting.
- Clamp the open edge of the bag between the plates for 2 to 3 seconds.
- Move along the edge, overlapping each section slightly so there are no gaps.
- Let it cool and inspect.
Use a straightener you don’t need for your hair anymore. Residue from styling products can contaminate the seal, and plastic residue isn’t something you want on your hair.
Method comparison
| Method | Seal quality | Best for | Watch out for |
|---|---|---|---|
| Impulse sealer | Excellent, consistent | Businesses, frequent sealing, thick bags | Small upfront cost |
| Clothes iron | Good | Large bags, home food storage | Scorching thin bags, uneven pressure |
| Hair straightener | Good | Small bags, snacks, samples | Narrow seal, needs overlapping |
| Zipper alone | Not airtight long term | Daily-use products | Always heat seal for storage |
Ziplock mylar bags: do you still need to heat seal?
Resealable mylar bags are handy for products customers open and close often. But a zipper isn’t truly airtight. For shipping, retail or long-term storage, heat seal above the zipper. The customer tears off the top at the tear notch and then uses the zipper from there on. Our resealable mylar bags are designed exactly that way.
Using oxygen absorbers for food storage
For long-term storage of dry foods like rice, beans, oats, flour and freeze-dried meals, oxygen absorbers remove the oxygen left inside the sealed bag. That slows spoilage and stops pests.
- Only use them with dry foods (roughly 10% moisture or less). Low-oxygen packaging of moist foods can create a botulism risk.
- Work quickly. Absorbers start working as soon as the pack is opened, so fill, add the absorber and seal within about 15 to 20 minutes, and store unused absorbers in an airtight jar.
- Use enough. A common guide is around 300 to 500 cc for a 1-gallon bag and 2,000 cc or more for a 5-gallon bag, depending on how densely the food packs.
A day or so after sealing, a bag with a working absorber often looks slightly sucked in around the contents. That’s a good sign.
How to tell if a mylar bag is sealed properly
- Look at it. The seal should be even across the full width, with no wrinkles, bubbles or gaps.
- Squeeze it. Press the bag gently. Air shouldn’t escape anywhere.
- Pull it. Tug gently on both sides of the seal. A good seal won’t peel apart.
- Check later. After a day or two, look again, especially for bags with oxygen absorbers.
If a seal fails, cut just below it and reseal. Leaving at least 2 to 3 inches of extra bag above the product gives you room to reseal a few times.
Common sealing mistakes
- Sealing over food dust or oil
- Using too little heat, which leaves a weak seal that peels apart
- Using too much heat, which melts through or warps the bag
- Wrinkles in the seal line, which leave tiny air channels
- Filling bags to the top with no space left to seal
Choosing the right mylar bags
Thickness matters. Bags around 3.5 to 4 mil are fine for retail snacks and short-term packaging, while 5 to 7 mil bags are better for long-term food storage and anything with sharp edges. For products that need to stay fresh and discreet, smell-proof and light-blocking bags are worth the upgrade.
We print custom mylar bags in stand-up, flat, die-cut and zipper styles, including heat seal mylar bags, mylar bags for food storage and smell-proof mylar bags. If you need a barcode on your bags, our guide to barcodes and UPCs on product labels explains where to place it.
Frequently asked questions
Yes. Use a dry, medium-high setting, place the opening over a flat wooden board, and press firmly along the edge for 2 to 3 seconds per spot. Test on an empty bag first.
It depends on the bag thickness and the tool. Start at a medium setting and increase until the seal is smooth and holds when pulled. Too hot and the bag can melt through.
Yes, it works well for small bags. Clamp for 2 to 3 seconds and overlap each section so there are no gaps.
Not completely. For storage or shipping, heat seal above the zipper. The zipper is for convenience after the bag is opened.
Dry foods stored in properly sealed mylar bags with oxygen absorbers, kept cool and dark, can last many years. Exact shelf life depends on the food and storage conditions.